
Animation prompting is visual direction
If you have tested AI video tools, you already know the struggle. A still image can look amazing, but the animation can come back with face drift, strange motion, unstable lighting, unreadable text, or a camera move that was not what you imagined.
That is why animation prompting matters. A better prompt tells the model what should move, how it should move, what should stay stable, and how the camera should behave.
The shift: stop prompting like you are asking for random motion. Start prompting like you are directing a shot.
The full animation prompting workflow
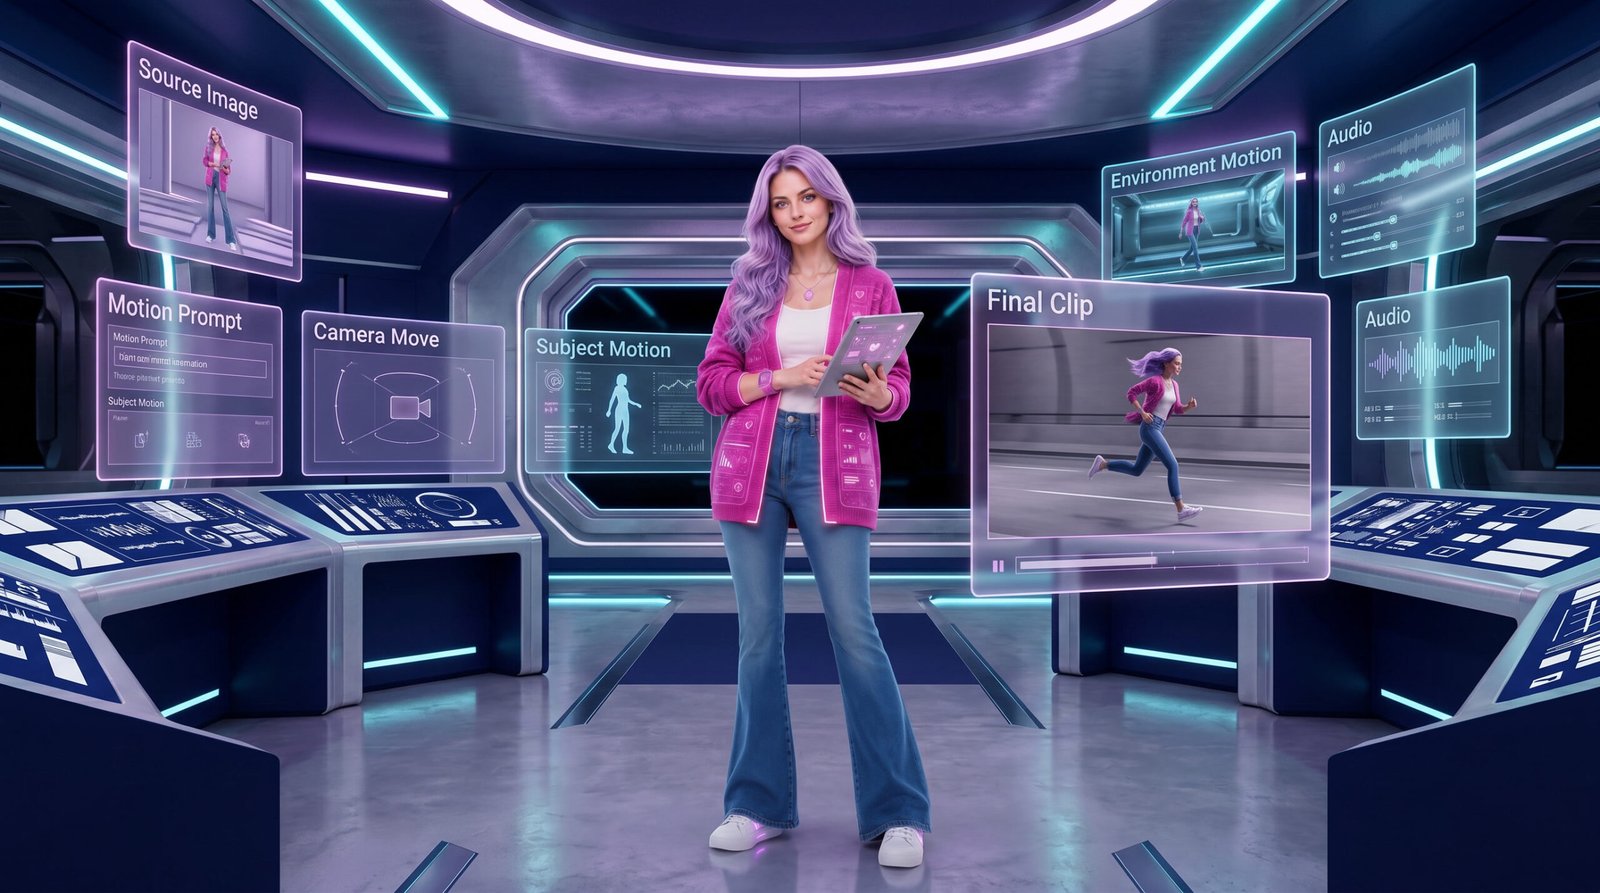
Agent Astra introduces the full animation workflow: source image, motion prompt, camera move, subject motion, environment motion, audio, and final clip.
Copy the image-to-video prompt structure
What is animation prompting?
Animation prompting is the process of telling an AI video model how to turn a still idea into motion. That might mean animating a source image, generating a scene from text, extending a clip, or directing a short cinematic moment.
The best results usually come from giving the model a clear motion hierarchy. Tell it what must stay stable first, then tell it what should move.
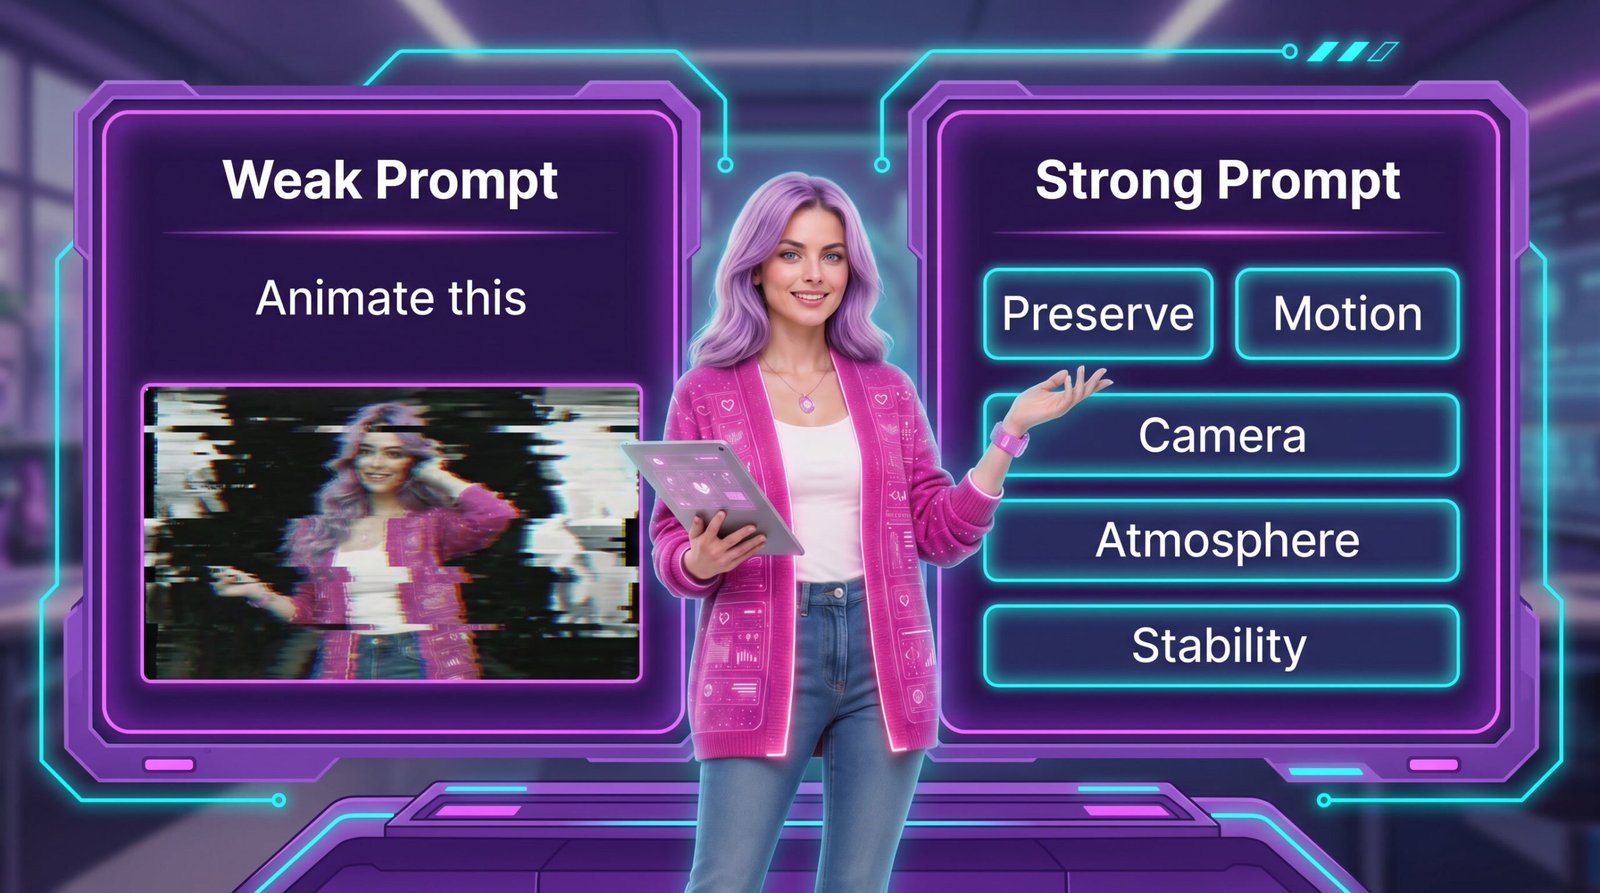
Weak prompt
“Animate this.” The model has to guess the motion, camera, pace, and visual priorities.
Stronger prompt
“Preserve the character from @image1. Use a slow push-in. Let fabric and particles move gently. Keep the face stable.”
The universal animation prompt formula
This formula works across many AI video systems because it focuses on directing the shot, not chasing one model’s temporary quirks.
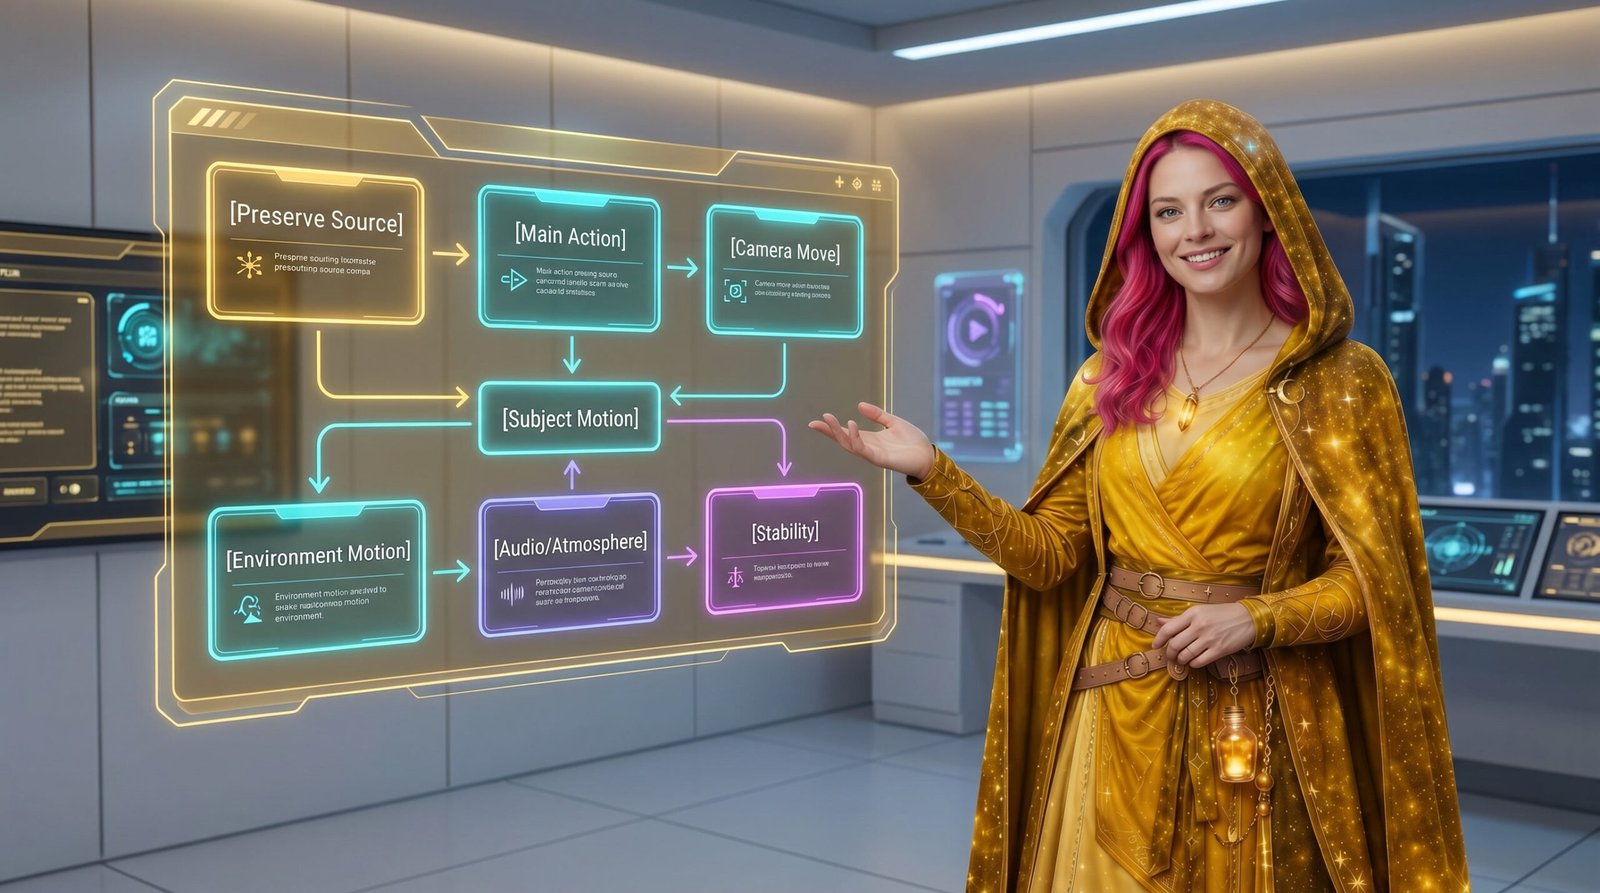
Prompt formula: Preserve the source + define one main action + direct the camera + add subject motion + add environment motion + guide audio or atmosphere + end with stability instructions.
Copy the universal animation prompt formula
Tell the model what must stay stable
One of the biggest AI video problems is drift. The model may animate the image, but it can also change the face, outfit, lighting, or composition if you do not give it stability instructions.
Copy the source preservation prompt
Plan the shot before you generate
Before you write the prompt, decide what the clip is supposed to do. Is it a hero shot, a tutorial visual, a product moment, a fantasy scene, a social teaser, or B-roll for a larger edit?
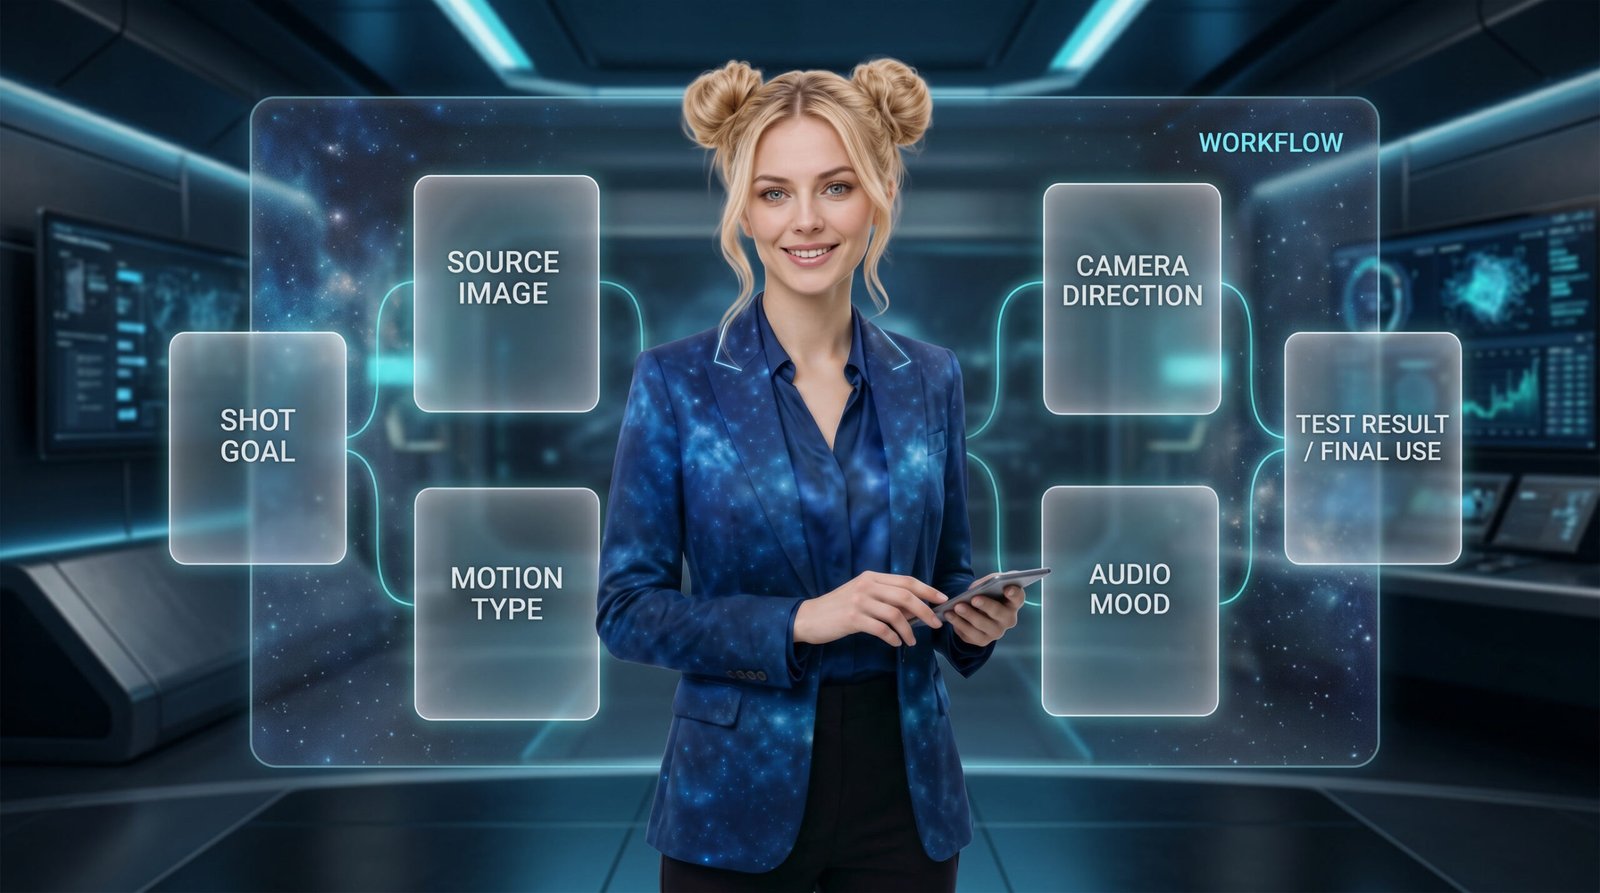
Shot goal
What is this clip supposed to communicate or support?
Motion type
Will the subject move, the environment move, or both?
Camera direction
Will it push in, orbit, track, pan, crane, or stay locked?
Final use
Will this become a blog embed, YouTube B-roll, a short, or a social teaser?
Camera language changes the output
Camera direction is one of the easiest ways to make an AI video feel more intentional. A locked-off shot feels educational. A push-in feels focused. An orbit feels cinematic. A tracking shot feels kinetic.
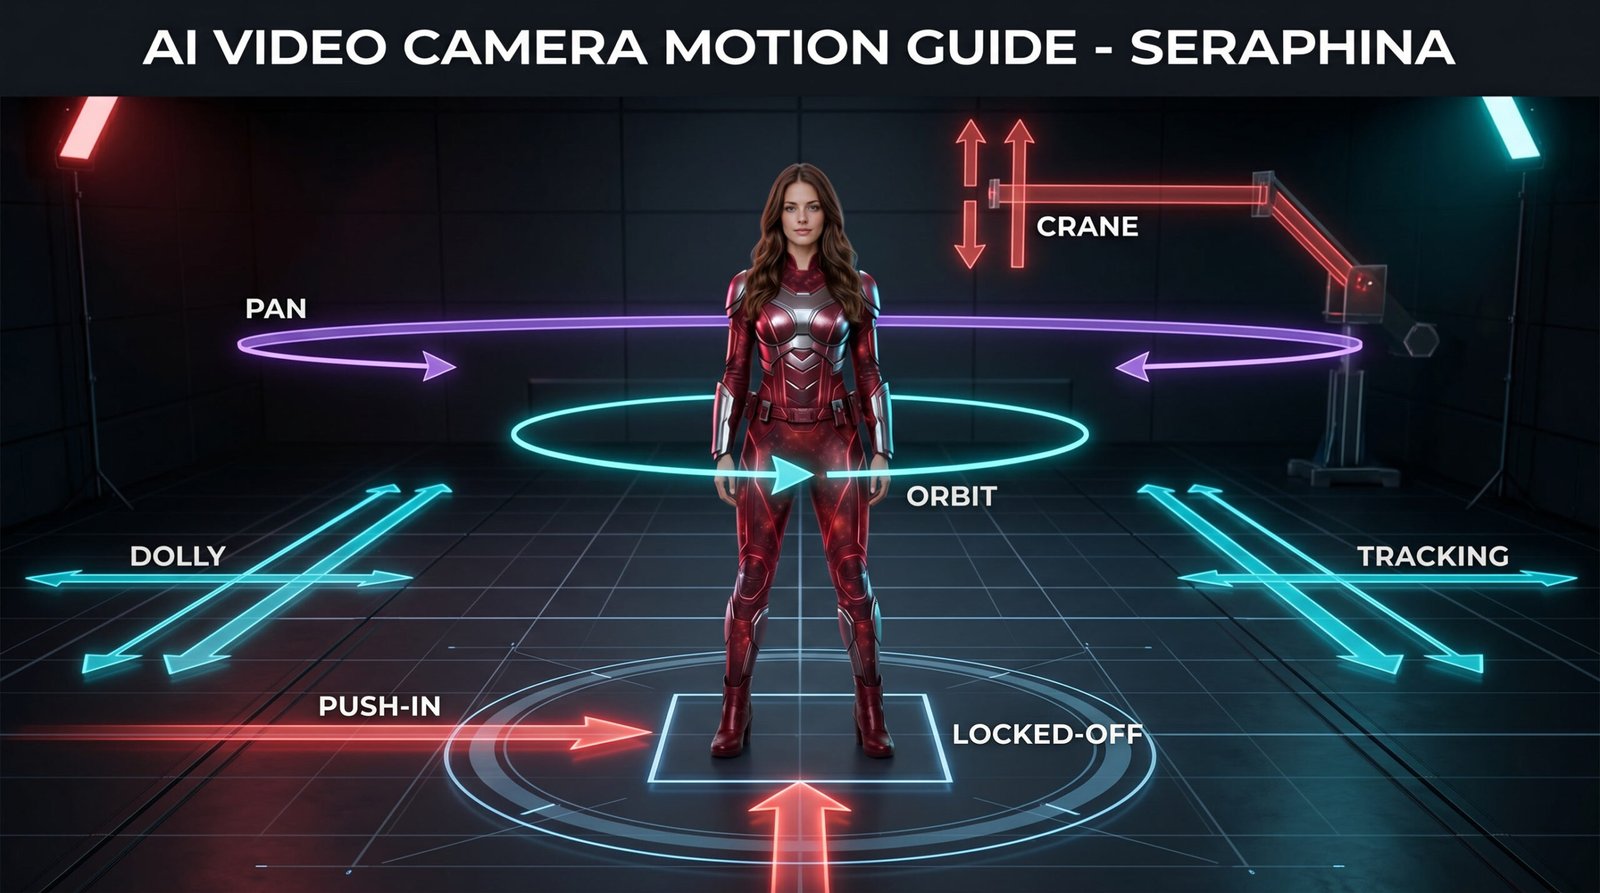
Copy the camera motion prompt
How camera angles change the same dance animation
This example shows why camera direction matters so much in animation prompting. We started with one still source image of the dancer, then used a longer PixVerse V6 prompt that changed the camera angle every few seconds while she continued dancing.
The point of this test was not just to make a dance clip. It was to show that the same source image can feel completely different depending on how you direct the shot. A wide locked-off view feels instructional. A push-in feels more focused. A side tracking shot feels more energetic. A low-angle shot feels more dramatic. An orbit shot feels more cinematic.
Wide locked-off shot
Best for showing full-body movement, choreography, and clear before-and-after comparisons.
Slow push-in
Best for making the shot feel more focused, intimate, and performance-driven.
Side tracking shot
Best for adding rhythm, movement, and energy to a dancing or walking subject.
Orbit or low angle
Best for giving the same subject a more cinematic, dramatic, or hero-style feeling.
Copy the PixVerse V6 camera-angle dance prompt
From still image to finished AI video clip
The AI generation is only one stage of the workflow. For creators, the polished result usually comes from a full process: choosing the source image, writing the animation prompt, reviewing the raw AI output, refining the clip in an editor, and adding audio so the final piece feels intentional.
This comparison shows the full path from the original still image to the PixVerse generated clip, then to the DaVinci Resolve edit, and finally to the music-finished version. That is the real creator workflow: prompt, generate, review, refine, and finish.
1. Start with the source image
The still image gives the model its anchor: character identity, outfit, lighting, pose, composition, and scene style. This is why strong image-to-video workflows usually begin with a clean, intentional source image.
2. Generate the AI video
The PixVerse prompt adds the dance movement and changes camera direction every few seconds to test shot design. This is where the model creates the first motion pass.
3. Refine in DaVinci Resolve
The raw AI output is improved with cleanup, base contrast, skin balance, neon pop, clarity, and subtle finishing polish. This step turns the clip from generated into something that feels more usable.
4. Add music and export
The final audio track gives the clip rhythm and energy. Once the grade and music are added, the animation feels more like a finished creator asset instead of a raw test render.
Creator takeaway: the AI model creates the starting motion, but the finished result comes from the full workflow. Prompting gets the clip moving. Editing, color, clarity, and sound make it usable.
Subject motion vs environmental motion
A lot of AI video falls apart when creators ask the main subject to do too much. One of the safest ways to get better results is to let the environment do more of the movement.
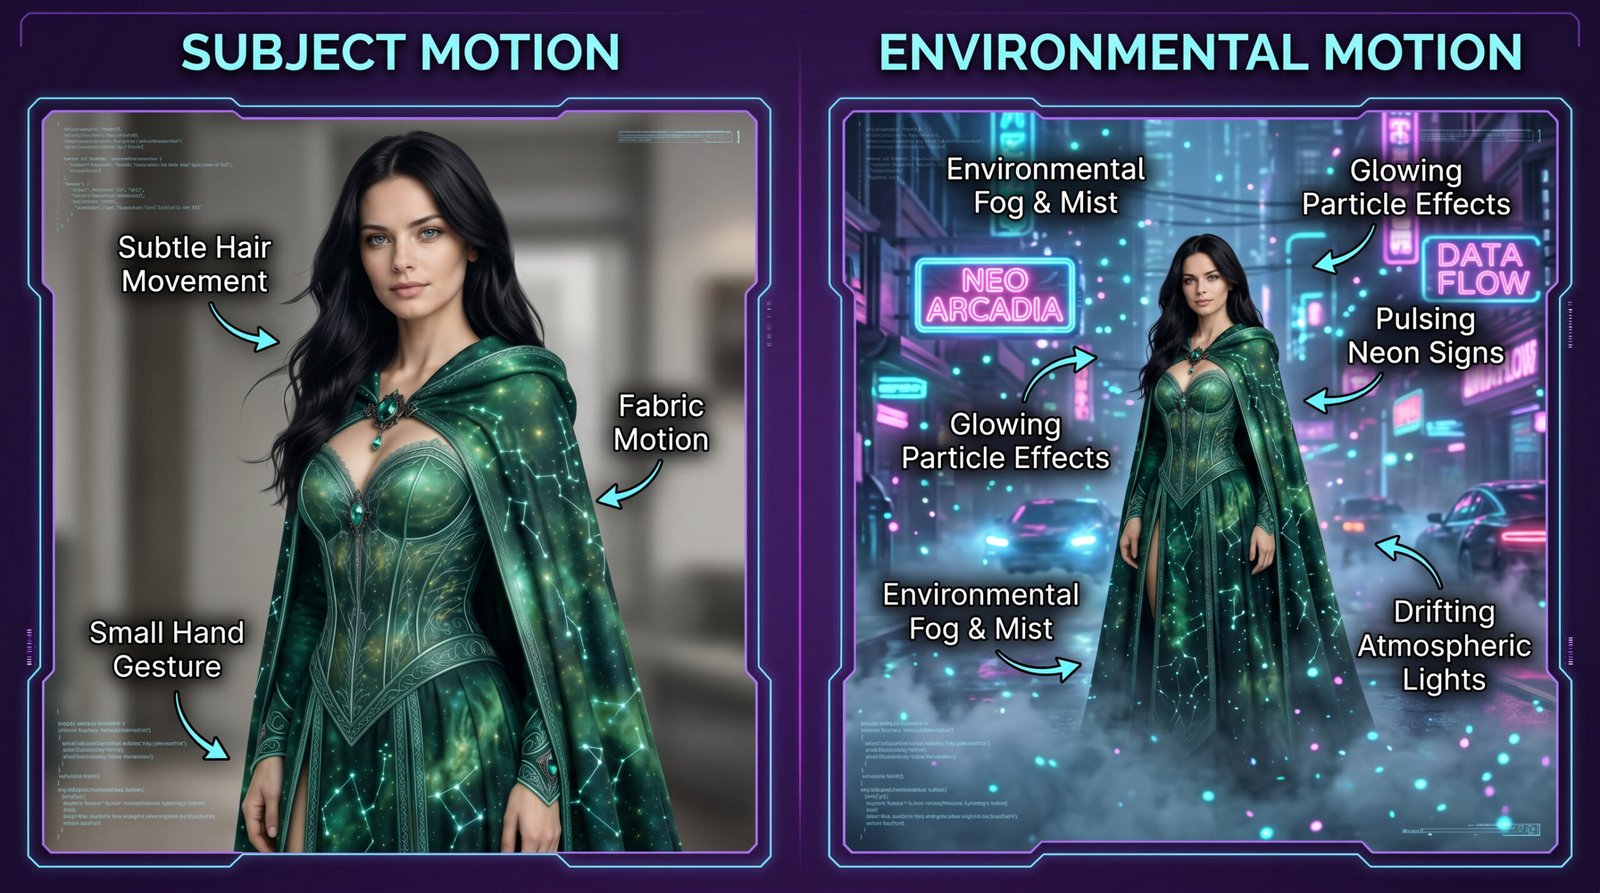
Copy the environmental motion prompt
Audio can guide the motion
Not every animation system handles audio the same way, but audio language still helps you think about rhythm, pacing, and atmosphere. You can prompt for chimes, hums, bass pulses, environmental ambience, waveform motion, or sound effects when the model supports it.
Copy the audio and motion timing prompt
Common animation prompting mistakes
Most bad AI video results are not just model problems. Often, the prompt asks for too much, forgets what should stay stable, or never tells the camera what to do.
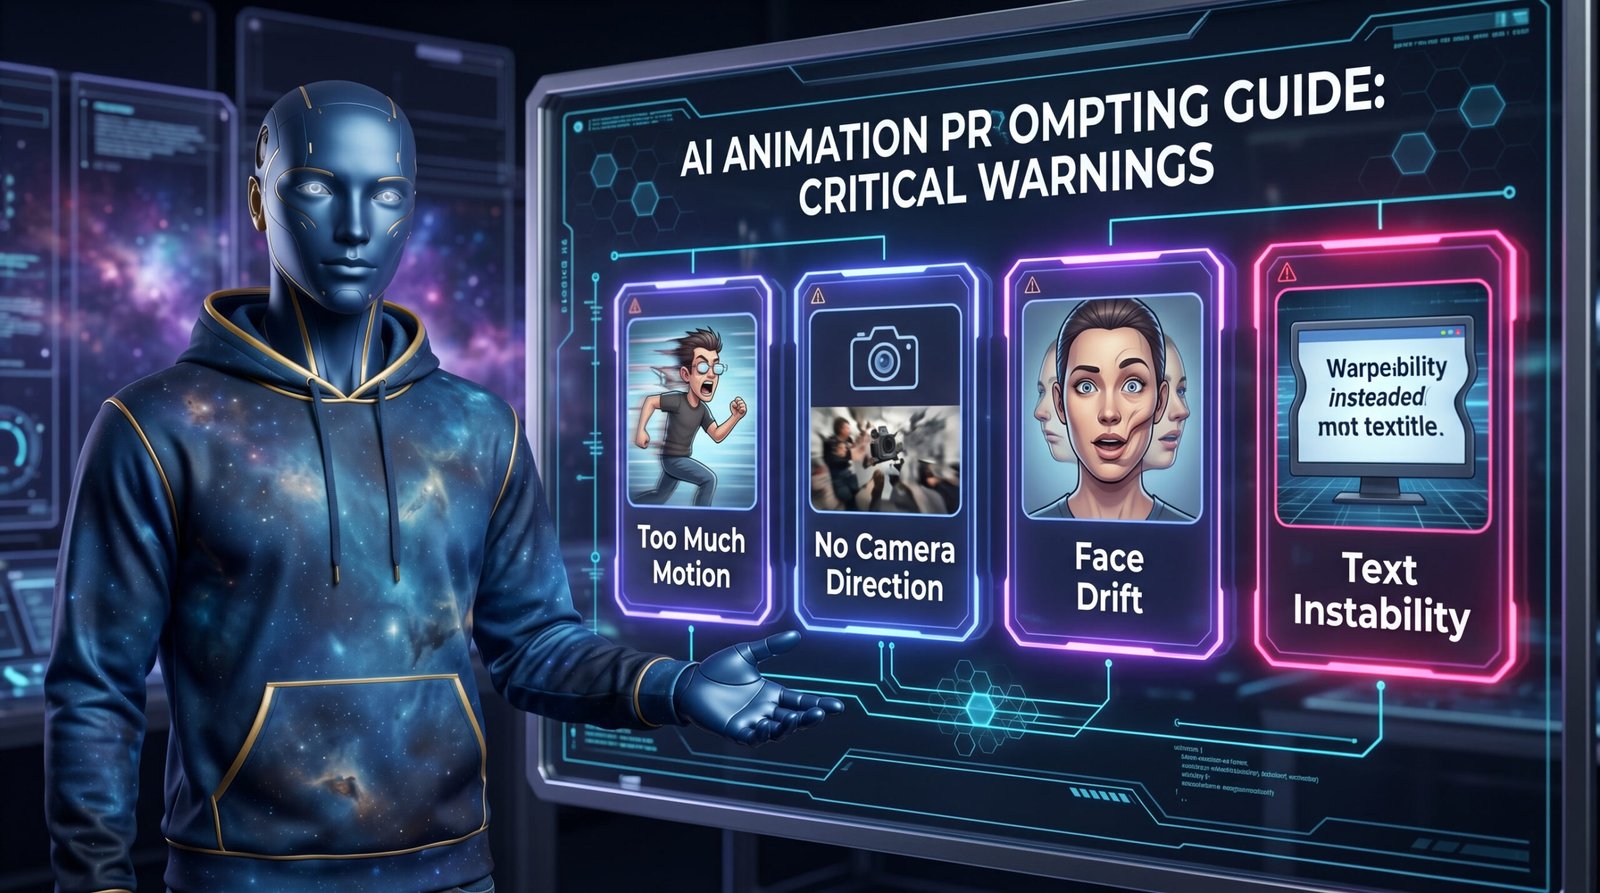
Too much motion
Give one main action. Short clips work better when the model is not juggling too many movements.
No camera direction
Add a clear shot style: locked-off, push-in, orbit, tracking shot, pan, dolly, or crane.
Face drift
Start with preservation language before asking the subject to move.
Text instability
If text matters, keep it large, simple, already present in the source image, and ask the model to keep it readable.
Model-specific tips without getting locked into one tool
The framework stays the same across tools, but each model responds a little differently. Use the same core structure, then adjust based on the system you are testing.
Grok Imagine
Strong for fast image-to-video tests and short cinematic clips. Use clear preservation and one camera move.
PixVerse
Good for stylized motion and social-ready clips. Be specific about camera sequence, pace, and motion intensity.
Pika
Useful for creative transformations, additions, and playful effects. Keep the action focused.
Luma
Camera language matters. Use dolly, orbit, tracking, push-in, and environmental motion clearly.
Runway
Think like a filmmaker. Define the shot, subject action, continuity, and final editing purpose.
MidJourney Video
Start with a strong image and keep motion controlled so the visual style does not distort.
How to test animation prompts like a creator
The goal is not to get lucky once. The goal is to understand why a prompt worked so you can repeat it.
- Start with one strong image or one clear text-to-video idea.
- Write one focused motion prompt.
- Test one camera move at a time.
- Watch for face stability, motion quality, lighting shifts, and artifacts.
- Change only one variable when you test again.
- Save the prompts that work inside your own prompt library.
Creator rule: If you want a specific character, outfit, or brand style, image-to-video usually gives you more control. If you want abstract B-roll, motion graphics, or environments, text-to-video can work well when the prompt gives the model a strong structure.
Ready to make your images move with more intention?
Start with the framework, test one motion idea at a time, and build a prompt library that helps you create better AI video clips across multiple tools.